WATCH THIS LESSON FIRST! Munchkin part 1
If you've never painted with me before, this is a great lesson to start with! I go a little more in depth into how I do my painting process.
The bonus videos I mention on Color can be found in the "Getting Started" section. The Template video is linked at the bottom of this page.
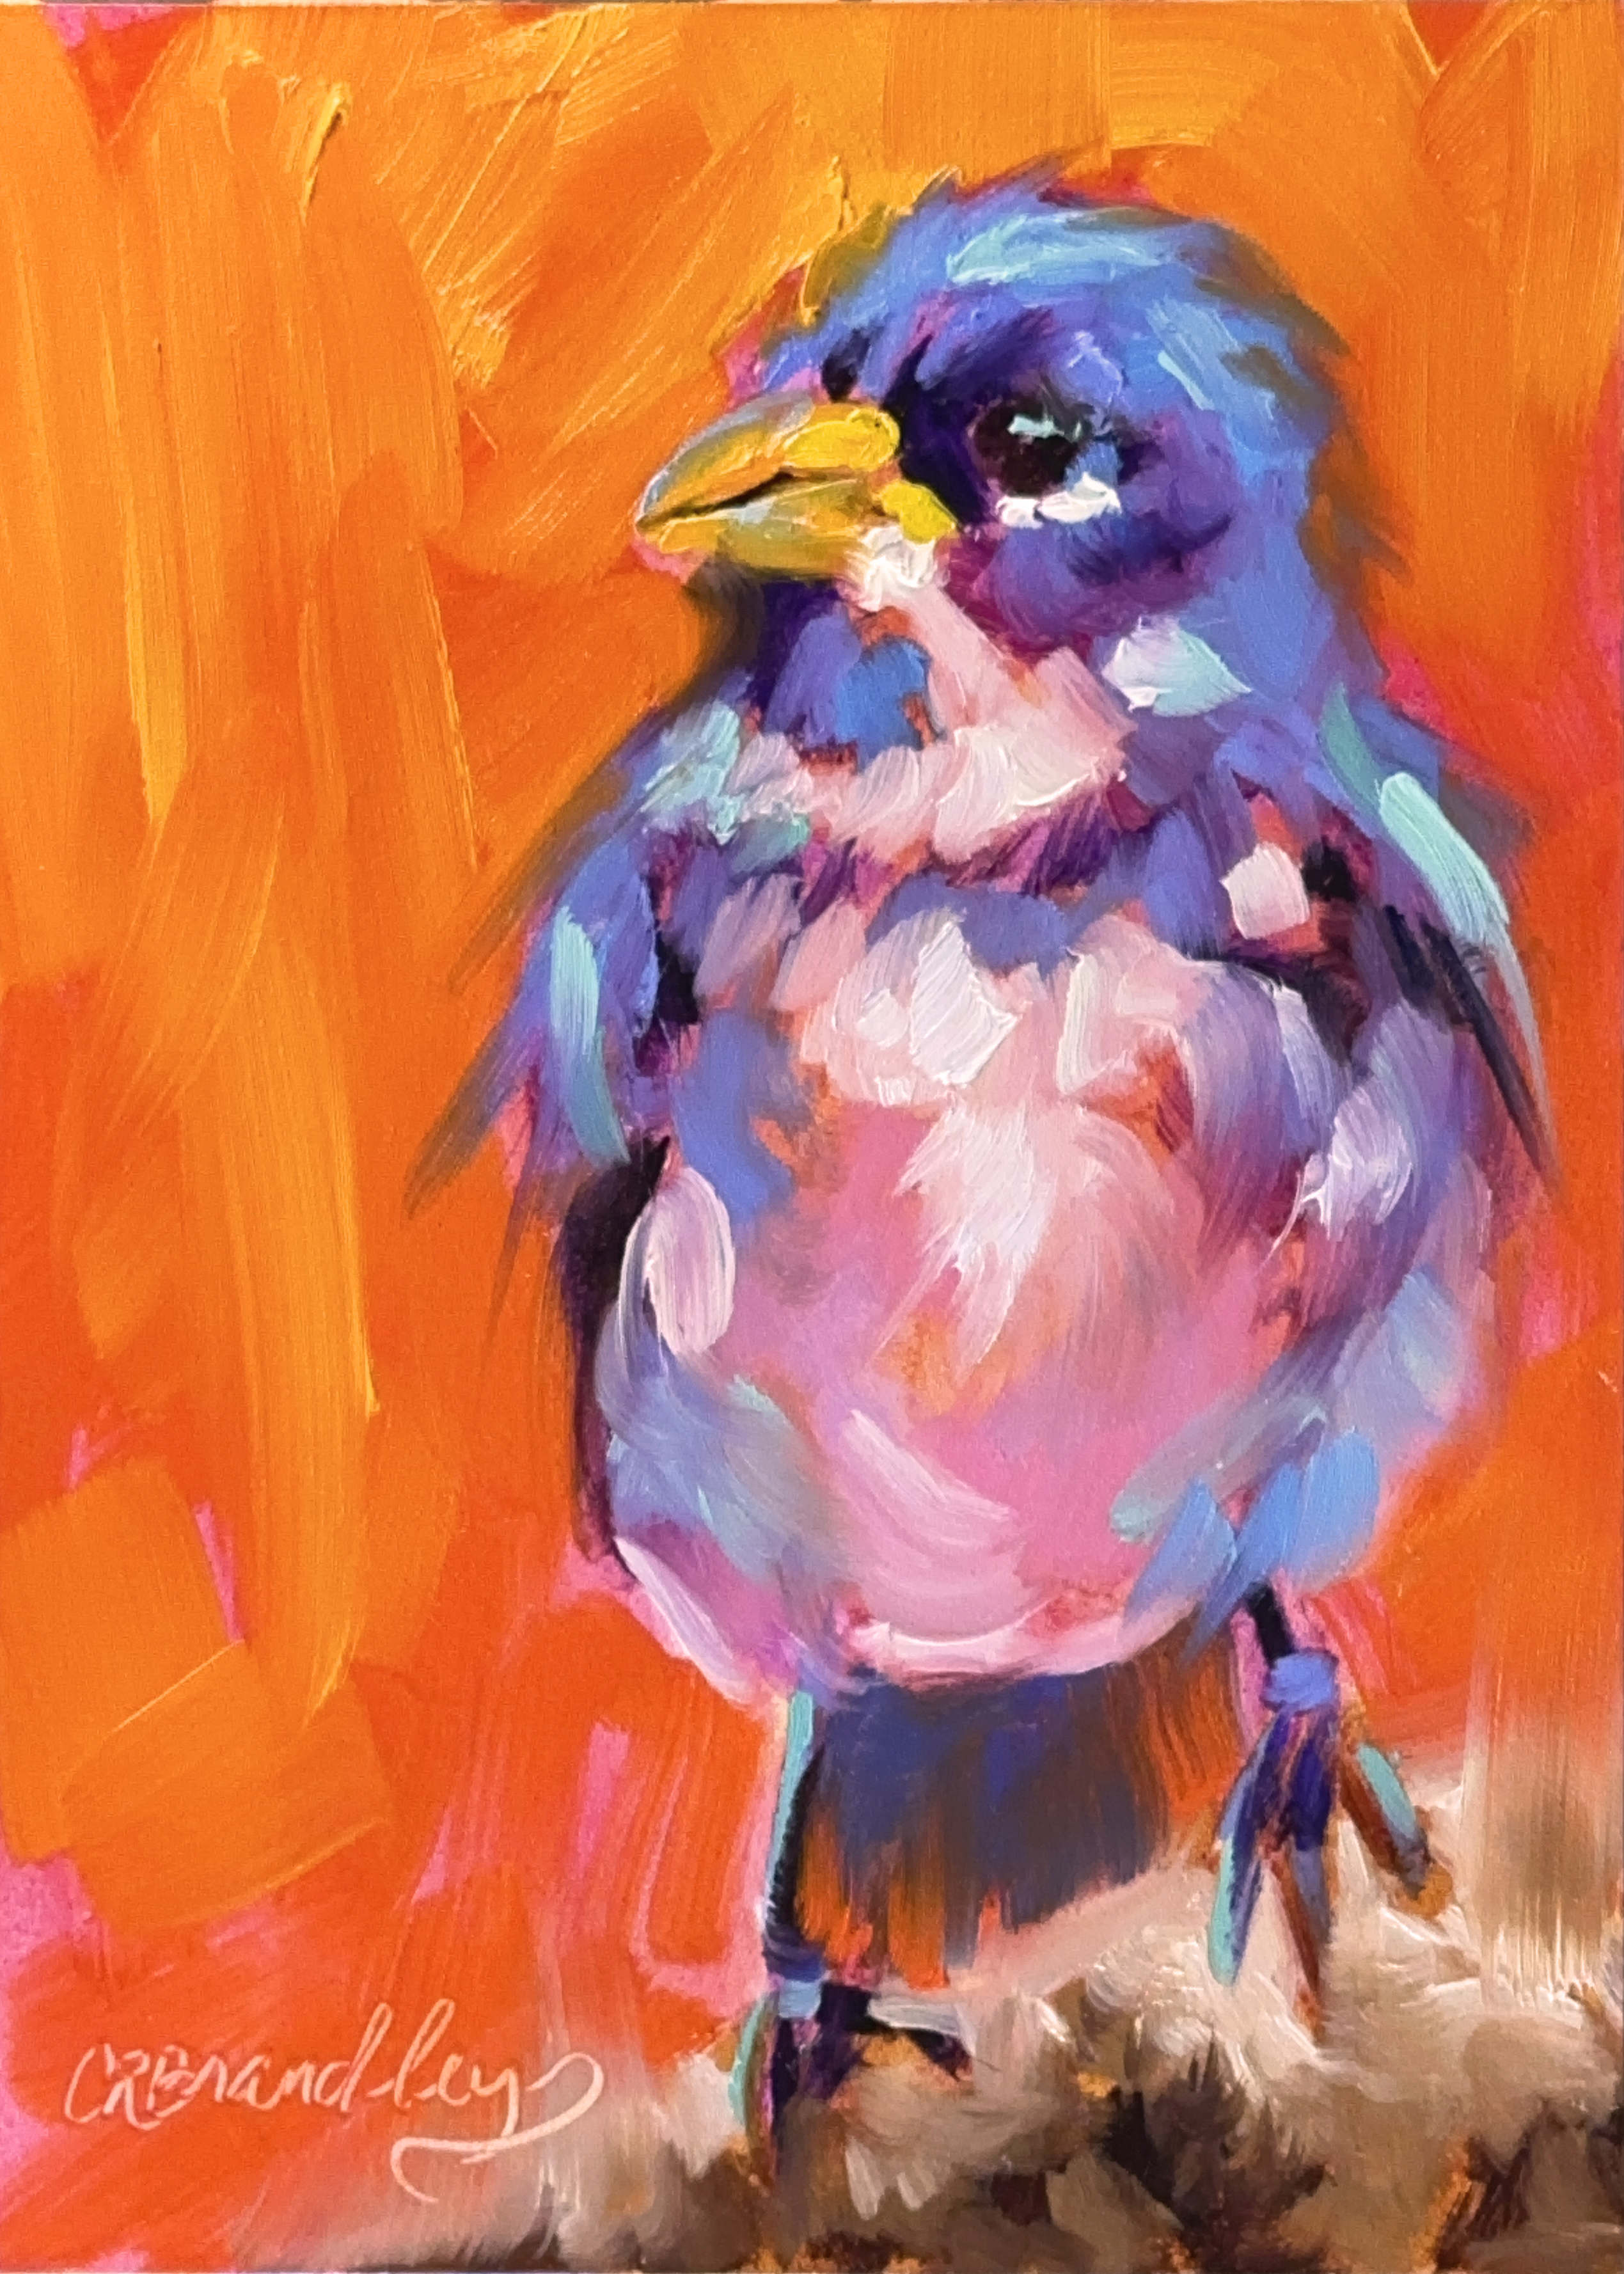
We're going to be painting this little bird, (a "Double Collared Seed Eater") from Brazil. One of my talented photography friends, Bruce Rosensteil of Small World Photos, is a world traveler and takes amazing photos of all kinds of wildlife, and he graciously lets me use some of his photos to paint from.
The painting lesson is broken down into 2 video parts. In part 1 we will use only the transparent colors plus medium for our under-painting. I highly recommend watching the video all the way through 1st, and then paint along with me as you watch again. You can always pause as needed!
Hint: Look at your paint tubes – a white square indicates transparent color, where as a black square indicates an opaque color.
You will use medium (50/50 Refined Linseed Oil/Solvent) for the 1st layer only.
Specific supplies needed for this lesson:
5x7 Ampersand Gessobord (or other painting surface)
Brush: Royal SableTek by Langnickle Size 20 Bright
Click below to get your reference photos, (There is a regular version, and a filtered version. The filtered version just breaks the subject down and helps simplify the shapes...kind of like if you were to squint), a copy of my finished painting, and the template. Your palette maps, color wheel, and acrylic color subs can be found in the "Getting Started" section.
*For those of you who are beginners, or would like to use a template for this painting, I've included it below. Just open, print (make sure you choose "actual size" and it will print out 8x8 for you to trace onto an 8x8 painting surface). You can either use artist' graphite paper (I use Sally's) or you can color the back of the template with pencil, then place the graphite side down onto the surface and trace.